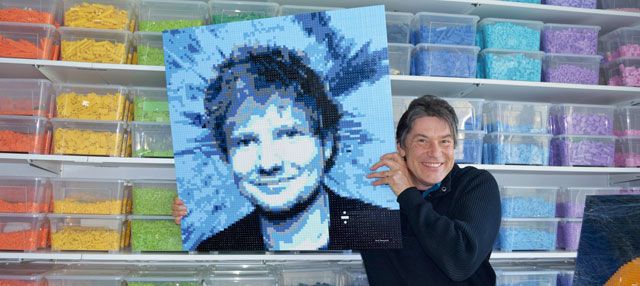
Have you ever wondered how we create our LEGO portraits? Well, all it takes is these 8 steps:
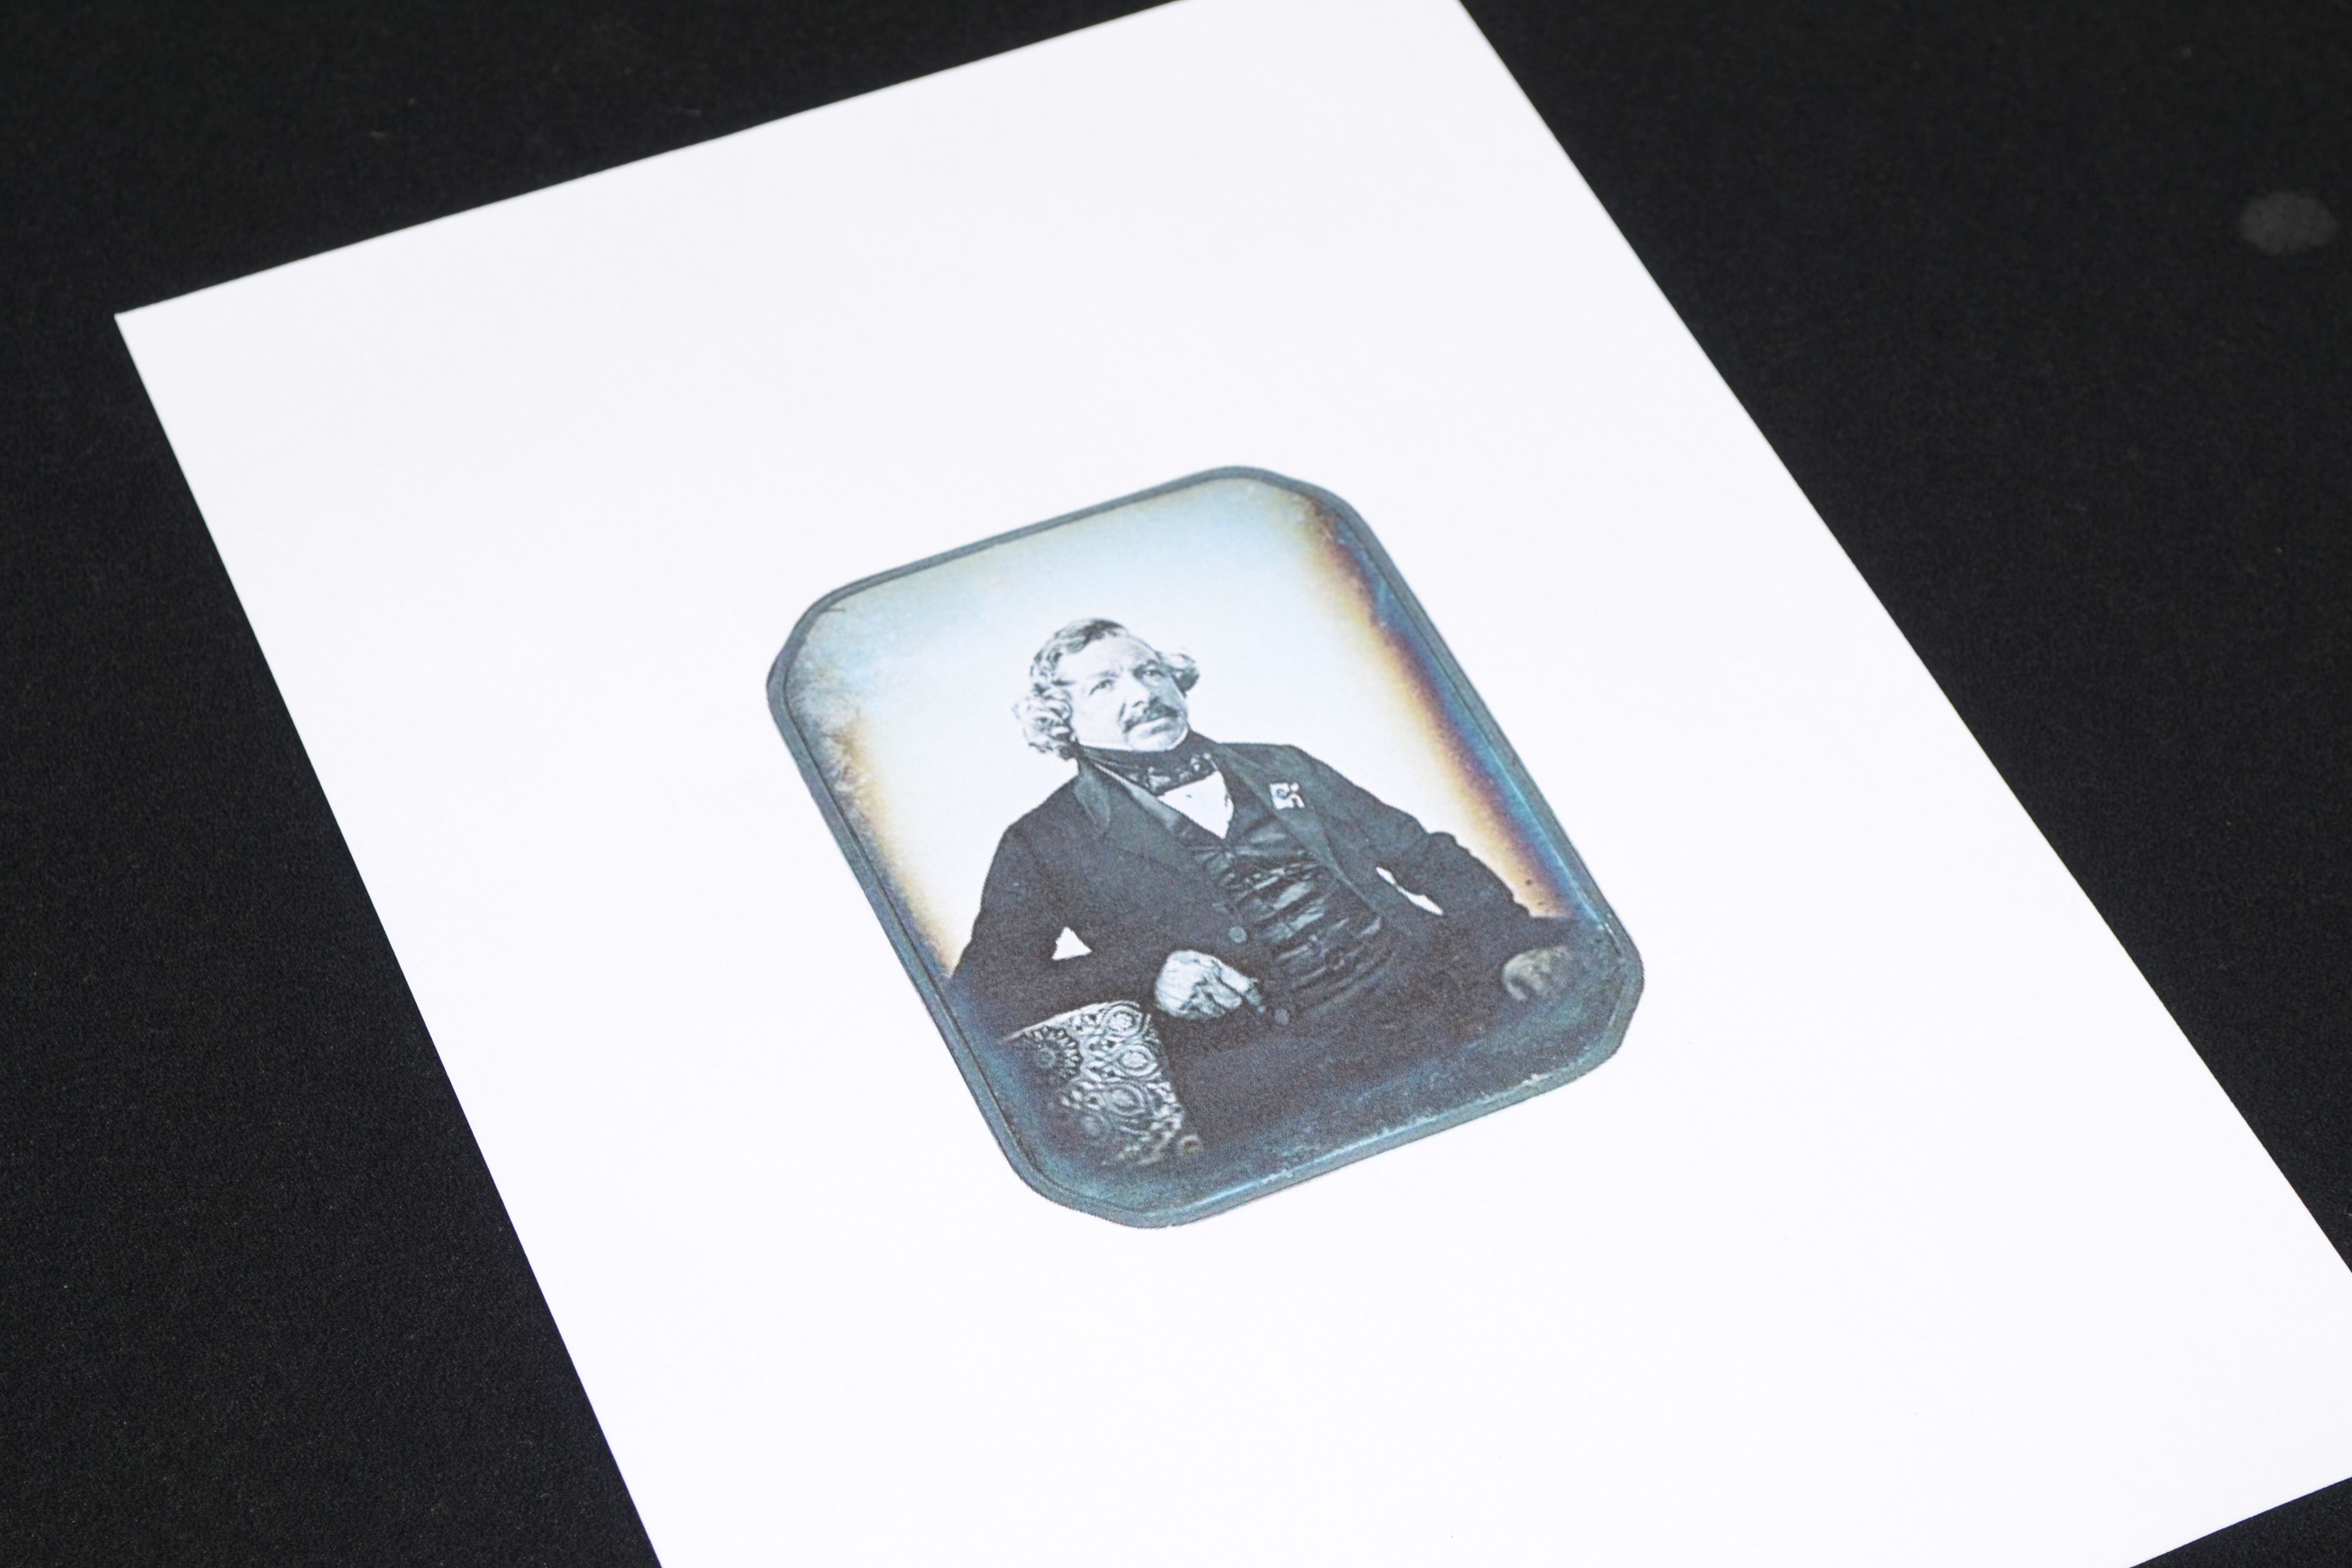
1. It all starts with a great picture.
Something you think is worth immortalizing in LEGO bricks. As an example, we’ll use this picture of mr Daguerre, one of the inventors or photography.
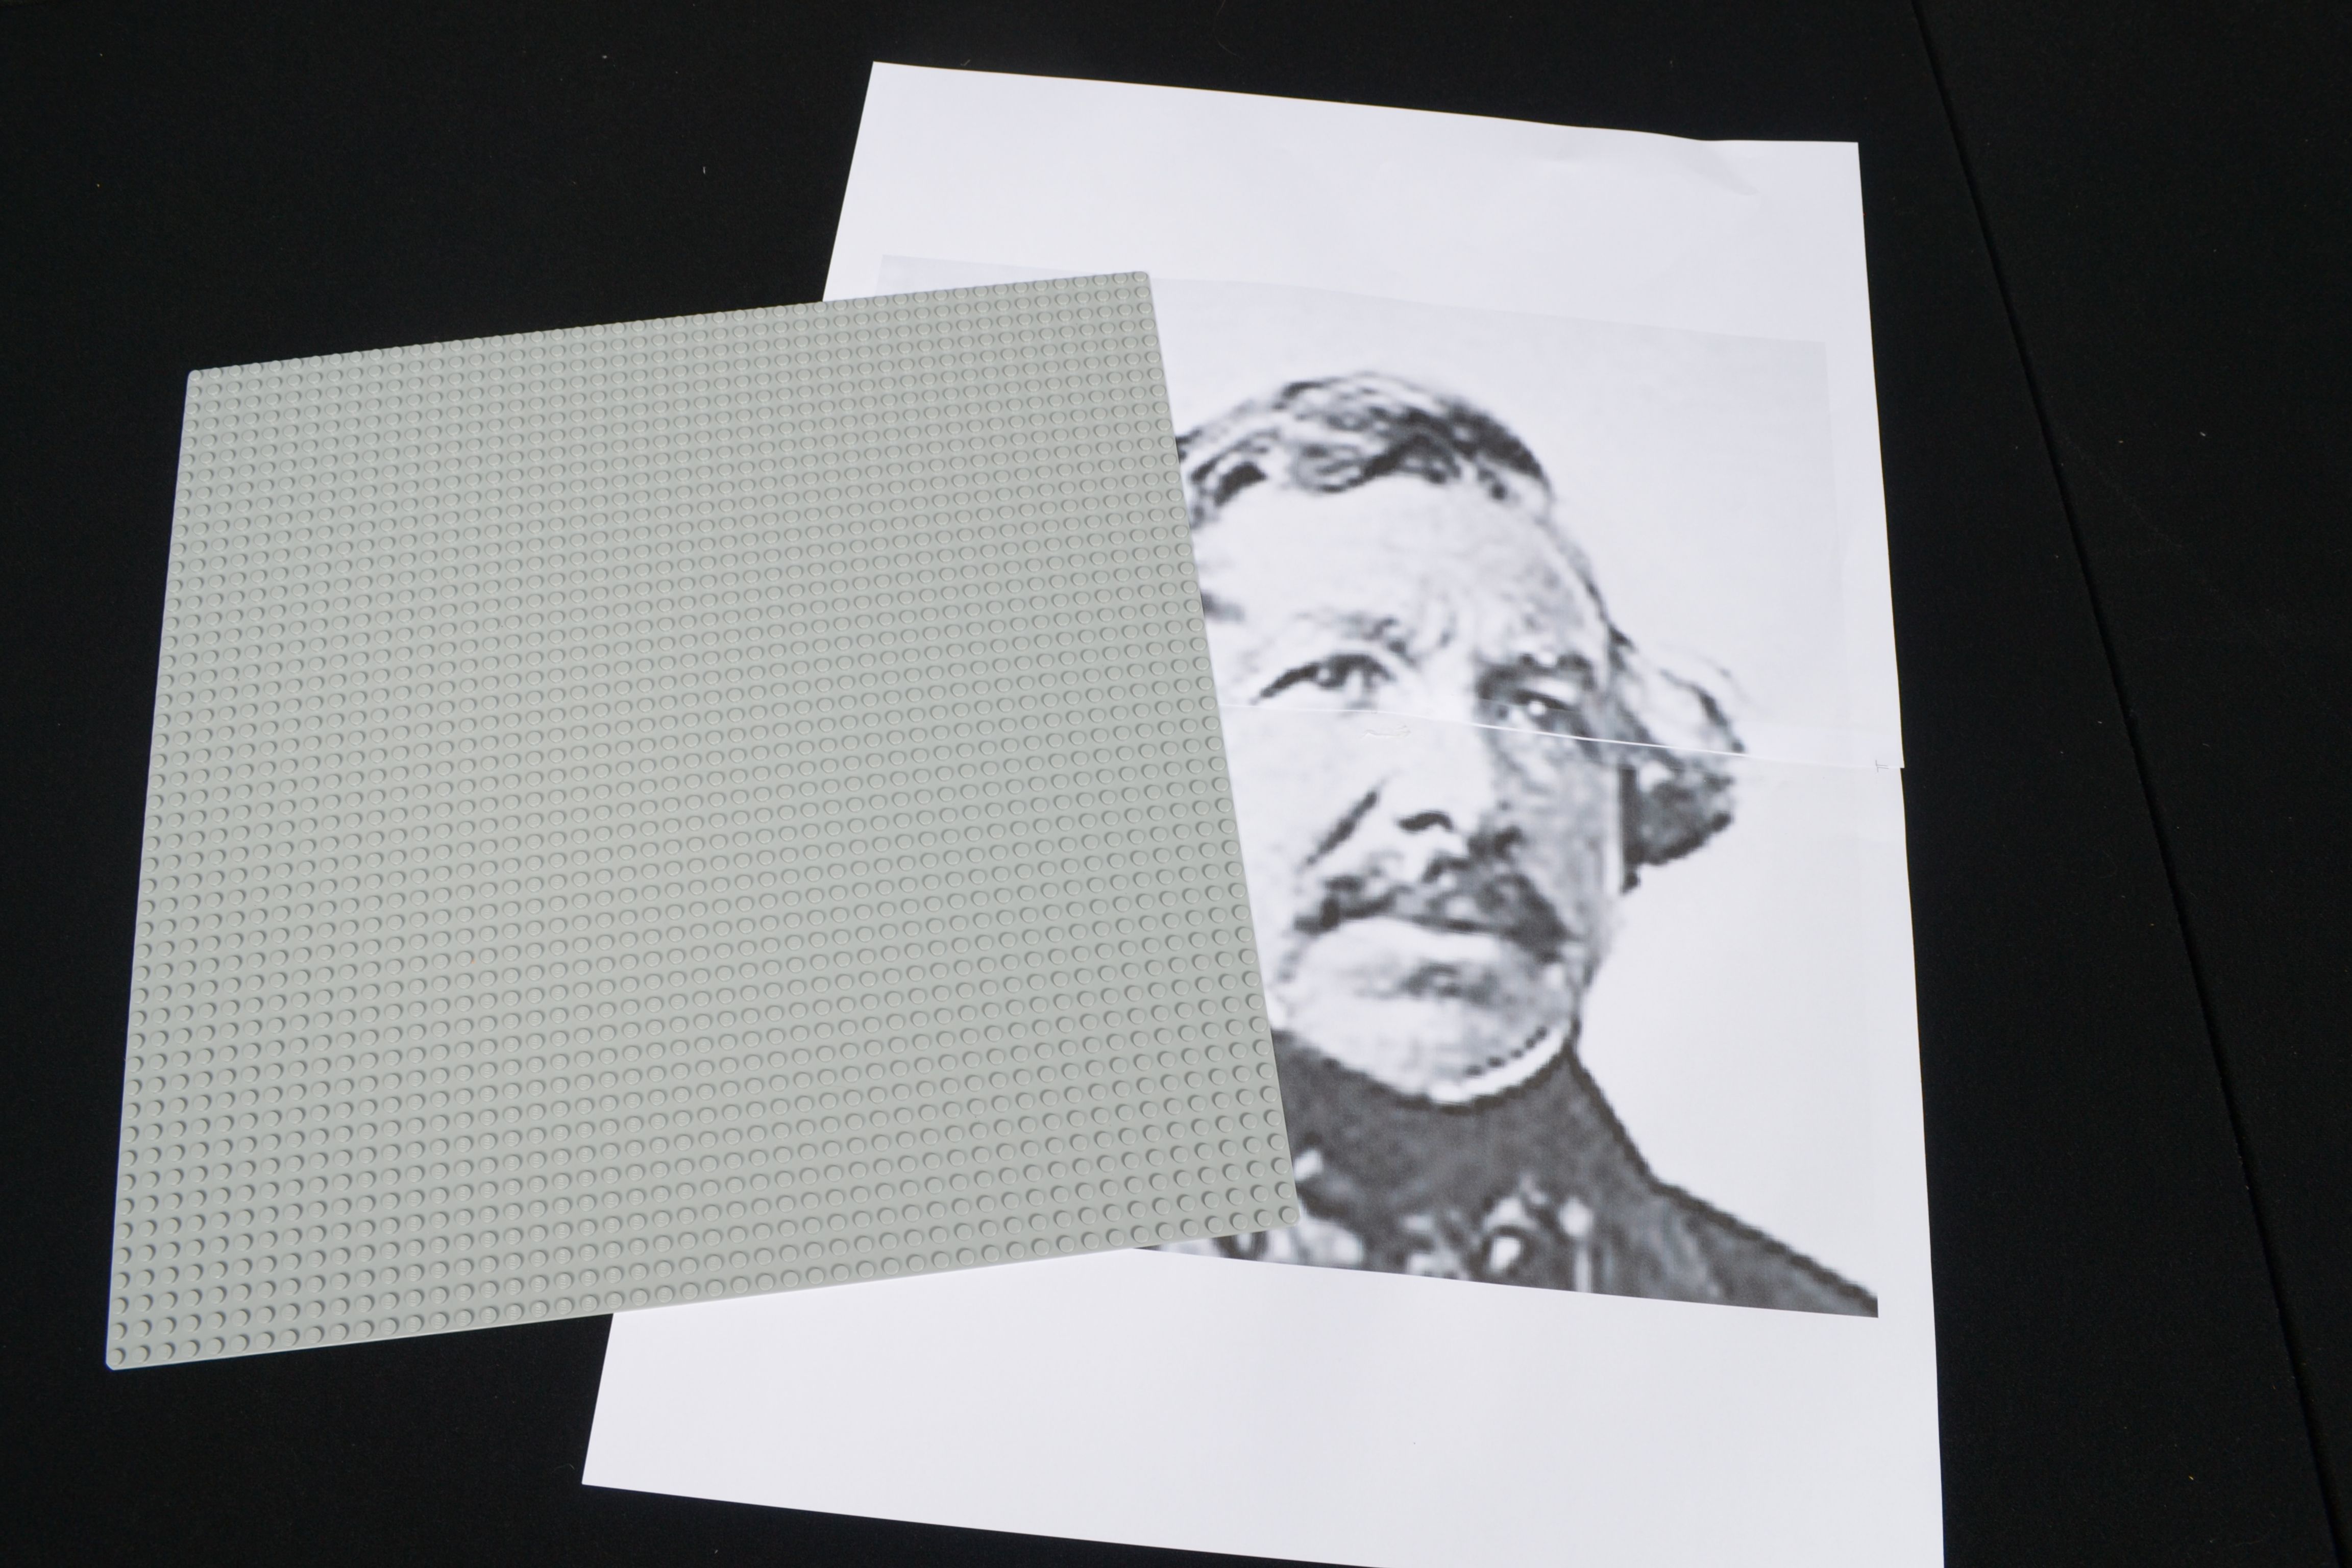
2. Then you pick a size.
To make things easy, let’s use a 48x48 nops base plate. You might find that your picture does not really work well on this scale. That has to do with resolution: the smaller the size, the fewer bricks you can use, the less precise the end result will be.
3. Choose between black and white (and greys), or full colour.
Again: the fewer colours you use, the less precise the end result will be.
Let’s say we choose black and white. You can then manually turn your picture into a design for a mosaic.
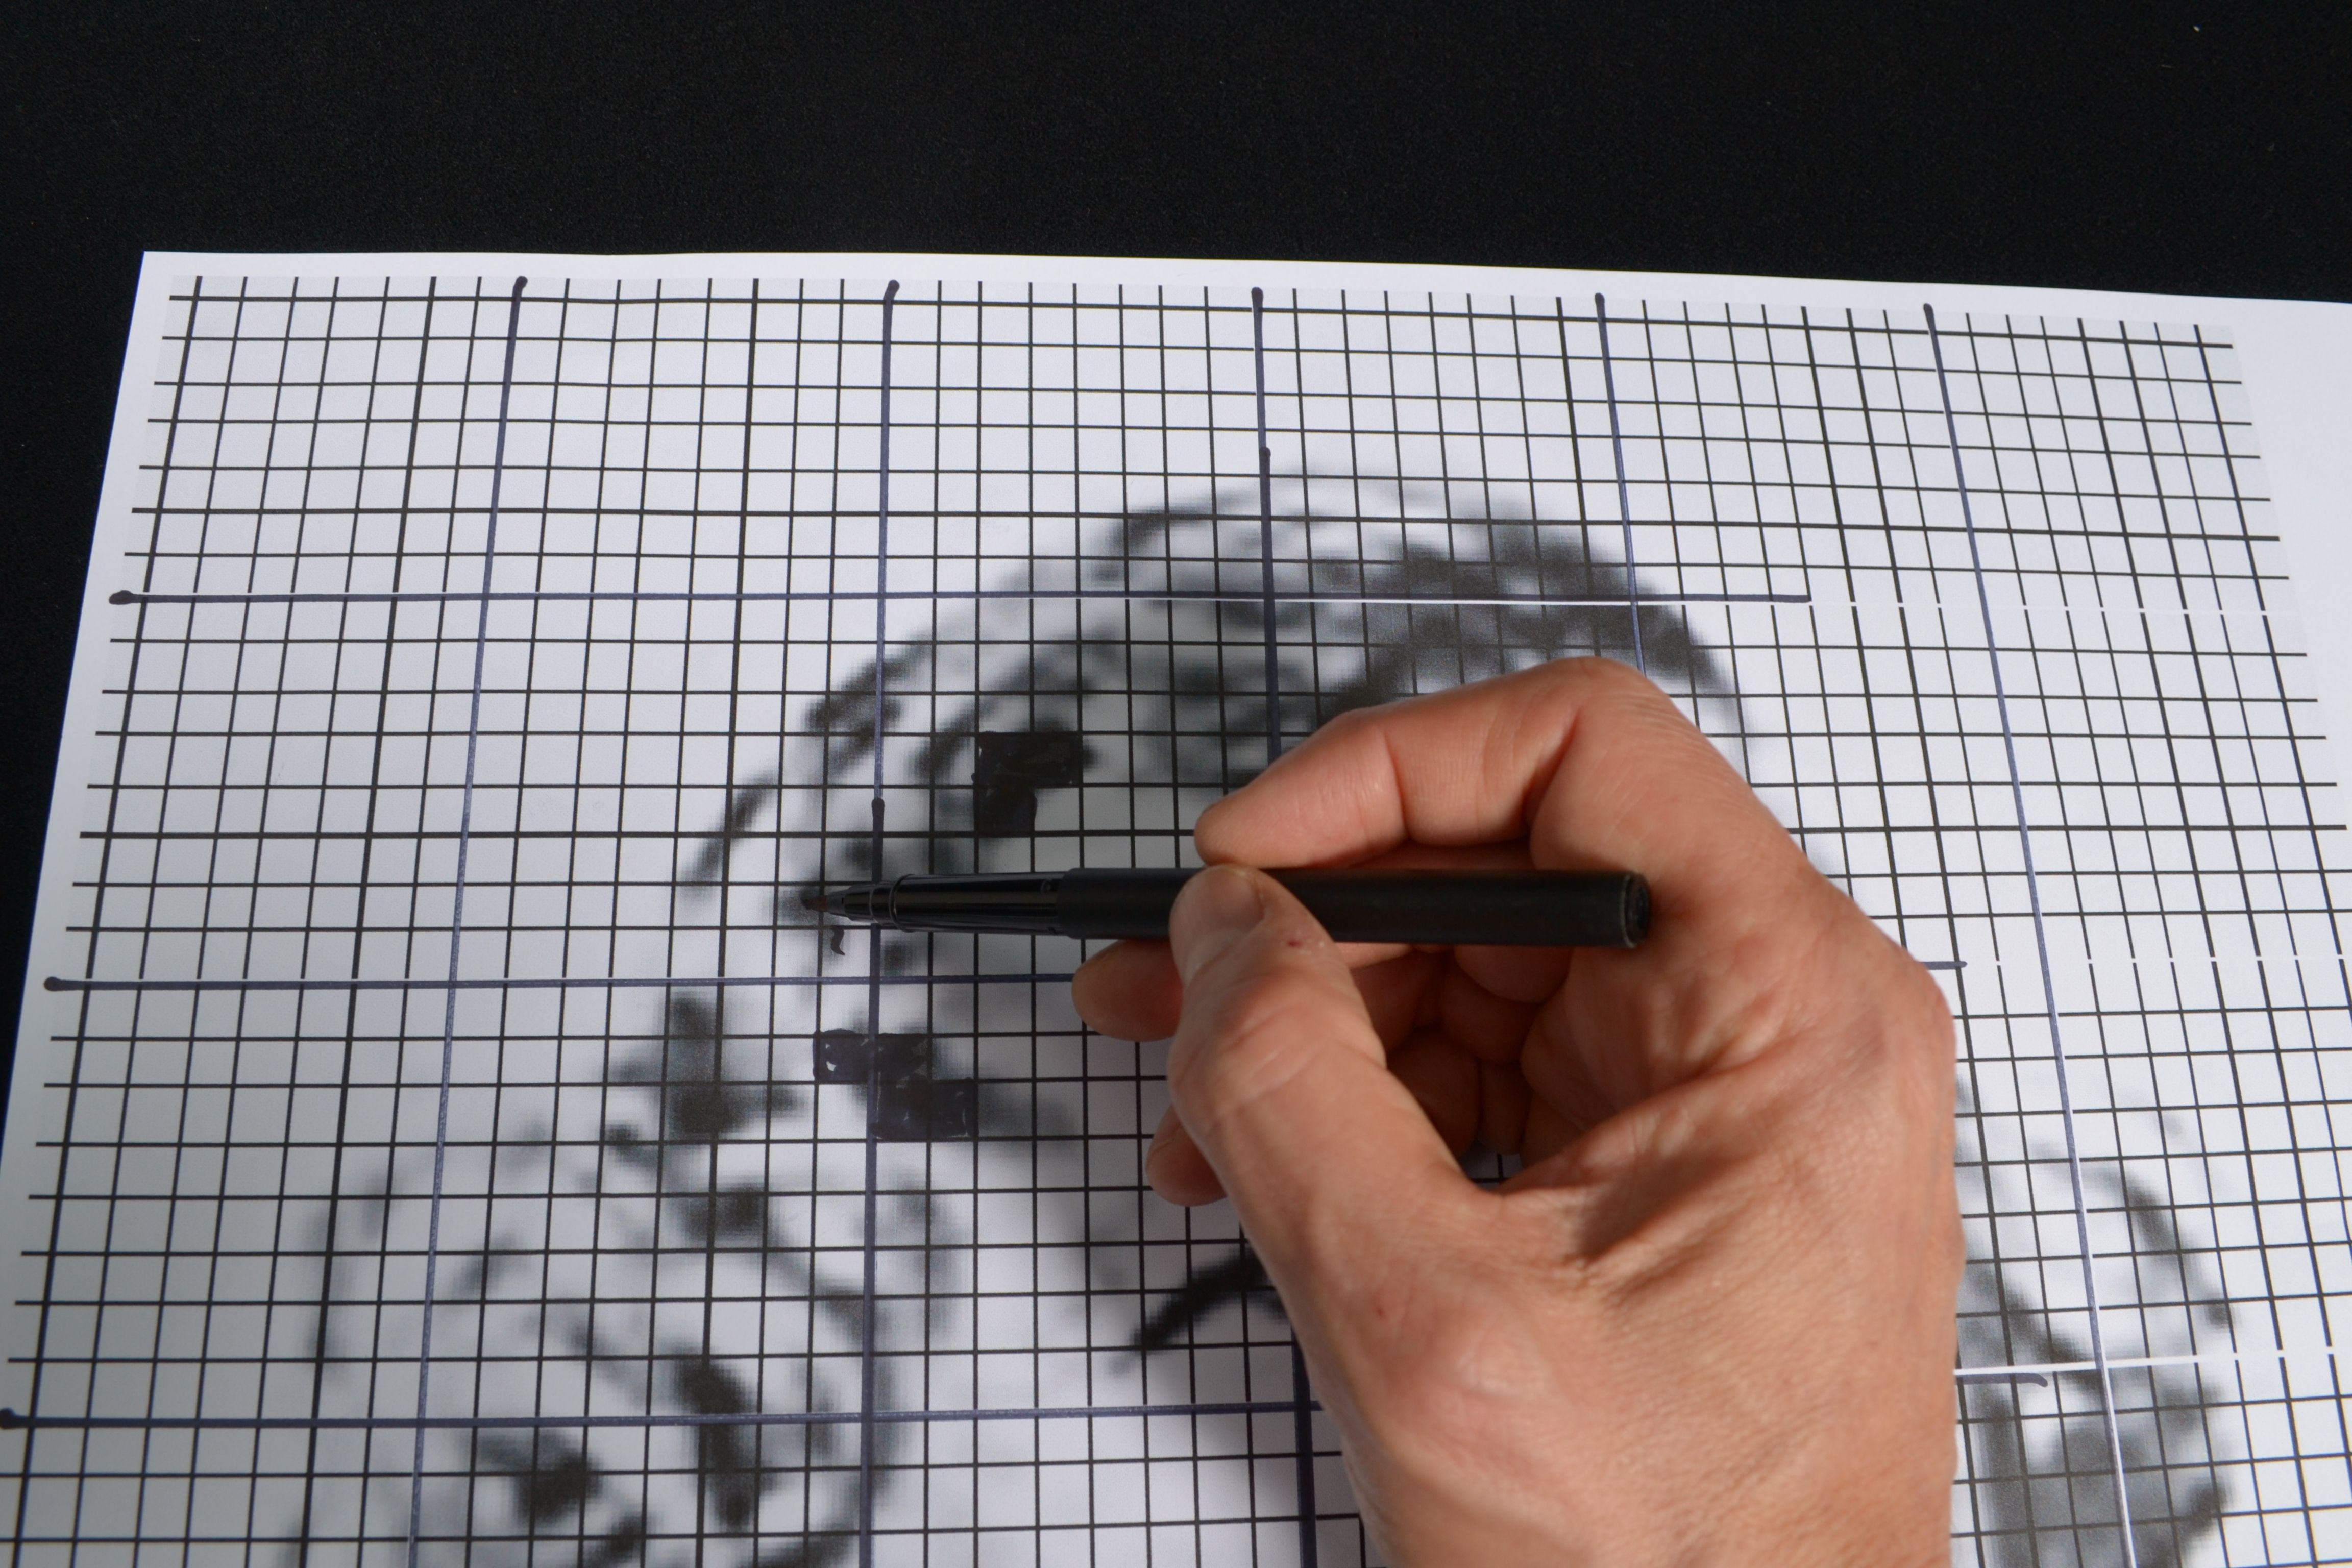
4. Print your picture in black and white modus in real size.
5. Draw a grid that is exactly as large as the LEGO nops.
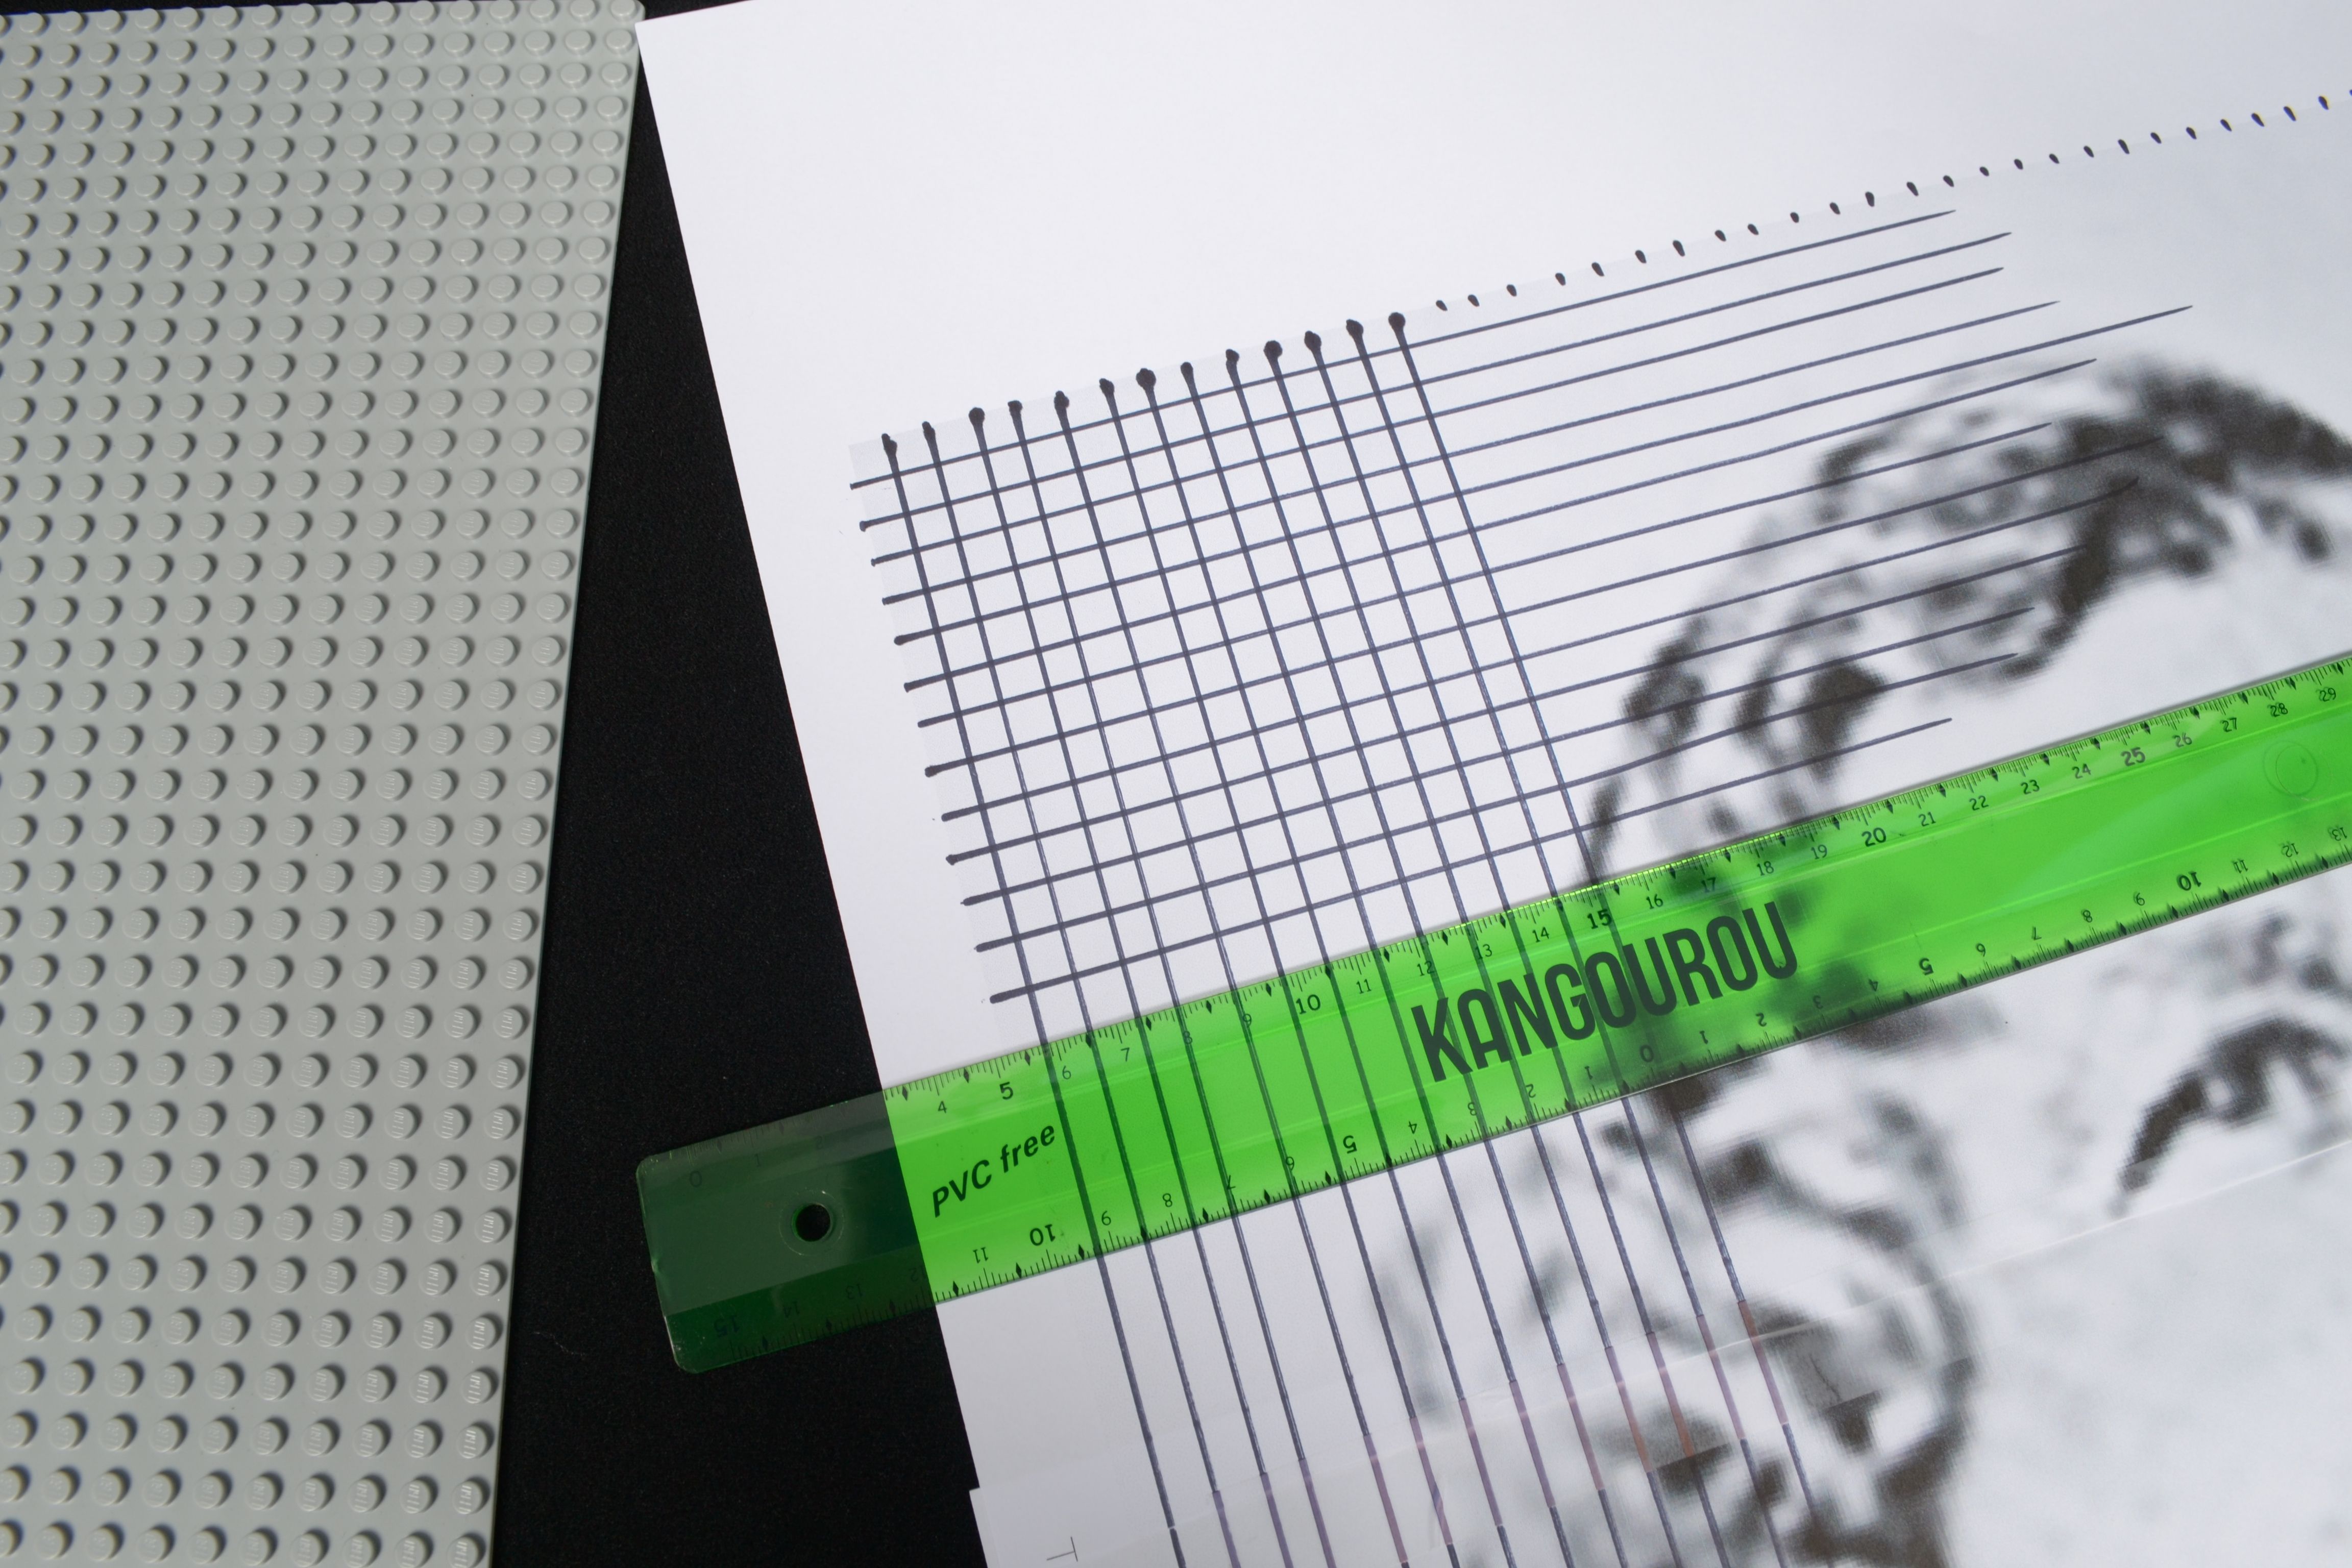
6. Decide per little square what color is dominant: black, white, light grey or dark grey.
7. Put a 1x1 plate on the corresponding spot on your LEGO base plate.
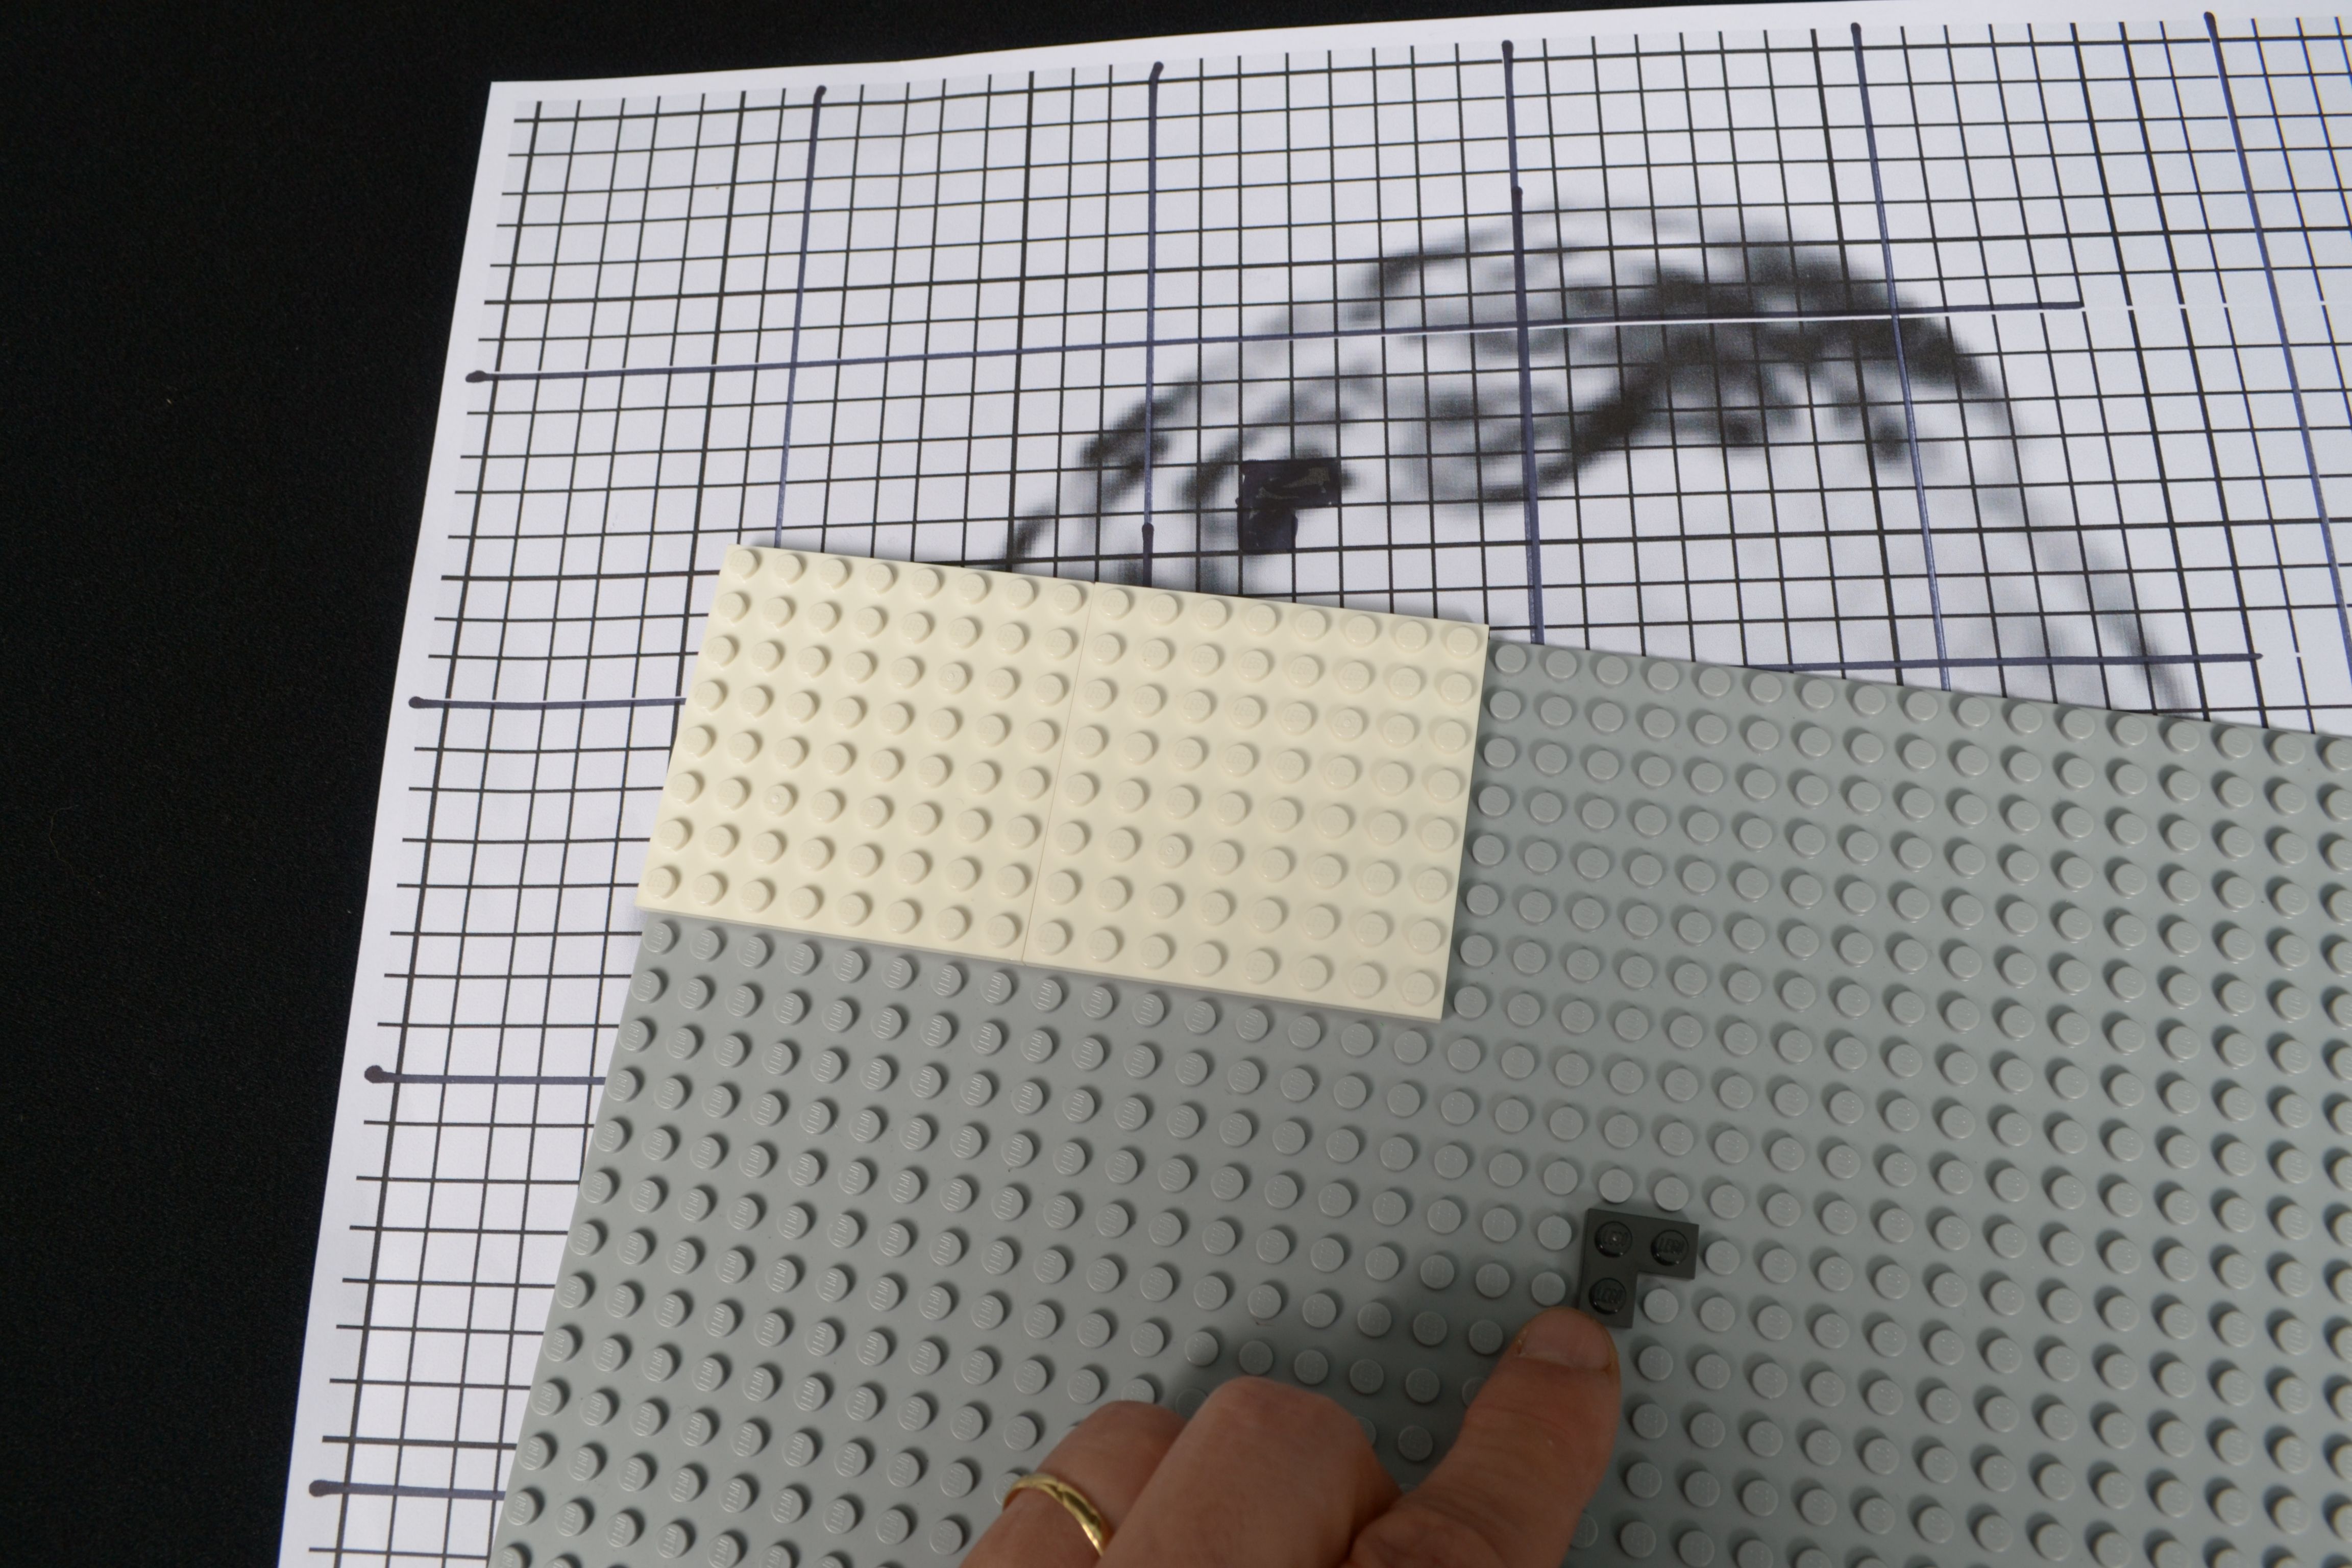
8. 2304 plates later, you’re ready !

Of course, when adjacent squares have the same color, you can save some time putting a larger LEGO element on those squares… Actually, we explained all this to Dutch TV host Klaas van Kruistum
As you can see, you don’t really NEED a computer to make mosaics with LEGO bricks. But of course, there is a lot of software that can help you with that.
So you might ask, if it is this easy, then where is the art in LEGO mosaics ? It’s in the choice of the picture, in the composition and most importantly: in the idea behind it.
Enjoy !
Dirk Denoyelle from Amazings


